susie@jxgreentape.com
Quick Diagnosis: Why Kapton Tape Lifts at the Masking Edge
Solder Leakage, Edge Curling, and Plating Seepage Are Not the Same
How a Small Edge Gap Turns into a Solder Defect
The First Place to Check: Is the PCB Surface Really Clean?
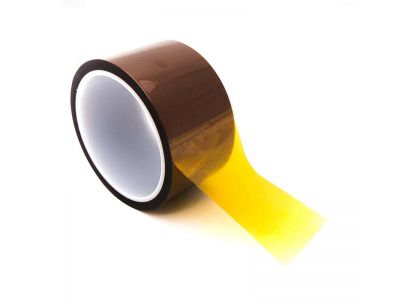
Why Thicker Kapton Tape Does Not Always Seal Better
Adhesion vs. Clean Removal: The Real Balance
Application Details That Quietly Decide the Result
Wave Soldering vs. Reflow: Different Stress, Different Failure Pattern
How to Prevent Kapton Tape Edge Lifting in PCB Masking
The RFQ Problem: Buyers Specify “High Temperature” but Not “Edge Seal”
What to Specify When Buying Kapton Tape for PCB Masking
Troubleshooting Checklist
FAQ
In PCB gold finger masking, failure usually starts at the edge, not in the center of the tape. A small lifted corner may not look like a big problem when the operator applies the tape. But once the board goes through wave soldering, solder dip, or a reflow-related masking process, that small gap can become a path for flux, vapor, solder, or surface contamination.
That is why Kapton tape edge lifting should not be treated as a simple “bad tape” complaint. Very often, the tape is only one part of the story. The real issue may be a mismatch between tape construction, PCB surface condition, application pressure, process heat, and removal requirements.
A high-temperature polyimide tape may survive heat and still fail as a PCB masking tape. For gold finger masking, the better question is: can the tape seal the edge, stay stable through the process, and remove cleanly without residue or contact contamination?
Before changing tape suppliers, first identify what kind of defect you are dealing with.
Solder leakage usually appears after wave soldering or solder dip. Solder reaches an area that should have been protected, often near gold fingers or connector contacts.
Thermal edge curling may appear after reflow or oven exposure. The tape edge lifts, curls, or shrinks back, but no molten solder has moved under the tape.
Plating seepage is more related to PCB fabrication and electroplating masking. The boundary may look blurred or contaminated after wet chemical processing.
These problems share one clue: the masking edge did not stay sealed. But the root causes are not identical. This article focuses mainly on post-fabrication PCB masking, especially gold finger protection during wave soldering or solder dip, plus related reflow masking cases where edge curling or residue becomes a concern.
The failure path is usually not complicated:
Surface contamination or uneven pressure
→ incomplete adhesive contact
→ micro gap at the masking edge
→ flux infiltration or solder wicking
→ contact contamination, solder bridge risk, or rejected boards
On fine-pitch gold fingers, the tape may still look flat from above. That is the tricky part. The film can appear attached, while the edge seal has already failed at a microscopic level. Under magnification, you may see small bubbles, wrinkles, stretched tape, or a weak boundary line.
Capillary action makes the problem worse. Once flux or molten solder finds a narrow channel under the tape edge, it can travel farther than expected. The tape does not need to fall off completely. It only needs to lose the seal at the wrong place.
Pressure-sensitive adhesive needs clean, close contact with the surface. If the board has fingerprint oil, dust, flux residue, solder mask residue, cleaning-agent residue, or handling contamination, the adhesive may not wet out properly.
Gold finish, solder mask, and FR-4 also do not behave the same way. A peel value tested on stainless steel is useful for comparing tapes, but it does not prove the same tape will seal perfectly on every PCB finish. Peel adhesion should be used as a comparison tool, not as the only approval standard. Buyers can ask for peel adhesion data based on recognized methods such as ASTM D3330 or ISO 29862, then confirm performance on the actual PCB surface.
A simple shop-floor check is worth doing: apply the tape to cleaned boards and uncleaned boards, then run the same thermal process. If edge lifting changes dramatically, surface control may be the first issue to fix.
Many buyers assume thicker Kapton tape gives better protection. Sometimes it helps with handling strength. But for gold finger masking, thickness can also create a problem.
A thicker polyimide backing may be stronger, but it can be less conformable around small steps, solder mask edges, or narrow contact boundaries. If the tape bridges over a surface transition, the area may look covered while a tiny channel remains underneath.
A thinner backing often improves conformability, but it may be harder to handle, easier to wrinkle, or weaker during removal. So the RFQ should not simply say “1 mil Kapton tape” or “2 mil Kapton tape.” It should separate film thickness, adhesive thickness, and total thickness. Total tape thickness can be checked using pressure-sensitive tape thickness methods such as ASTM D3652/D3652M.
For fine-pitch masking, conformability often matters more than raw thickness. For wider, less critical masking areas, handling strength may matter more. This is exactly why sample testing is better than guessing from a datasheet.
A tape that never lifts is not automatically a good PCB masking tape. If it tears during removal or leaves silicone residue on gold fingers, it still fails the job.
Kapton tape for PCB masking needs a balance:
· enough adhesion to seal the edge during heat and handling;
· enough cohesive strength to remove in one piece;
· controlled residue after thermal exposure;
· no unacceptable contamination on contact areas.
Silicone adhesive is common in high-temperature polyimide tapes, but not all silicone adhesive systems behave the same. Room-temperature tack does not tell the full story. Ask for heat-aged peel and residue checks under a process close to your actual wave soldering, solder dip, or reflow condition.
For narrow-width rolls or die-cut parts, tensile strength and elongation are useful secondary checks, especially when operators remove the tape in one pull. These properties are commonly discussed with tape methods such as ASTM D3759/D3759M.
Even the right tape can fail if application is inconsistent.
Common problems include uneven hand pressure, trapped air, tape stretching, dirty gloves, storage humidity, and operators touching the bonding area after cleaning. These details sound ordinary, but they often decide whether the masking edge holds or fails.
For critical gold finger masking, thumb pressure is usually not controlled enough. A small roller, fixture, or defined pressing method gives better repeatability. The pressure should focus especially on the tape boundary, because that is where solder leakage usually starts.
Removal also needs control. Peeling too hot, too fast, or at an aggressive angle may increase residue, tearing, or static risk. The best removal window should be tested on real boards instead of guessed.

Kapton tape for wave soldering faces a more aggressive edge attack. The tape edge may see flux activity, preheat, molten solder movement, and handling disturbance. If the edge was not sealed before entering the wave, solder can wick under the film.
Reflow creates a different kind of stress. The tape is exposed to heating and cooling, and the edge may curl because of thermal stress, tape tension, adhesive softening, or poor initial wet-out. In reflow profiling or temporary protection, the tape may not face the same solder wave, but clean removal and stable positioning still matter.
So “Kapton tape for PCB masking” is too broad as a specification. The supplier needs to know whether the tape is used for gold finger masking, wave soldering, solder dip, reflow protection, thermocouple attachment, or temporary insulation.
Start with surface control. Clean the masking area, reduce manual contamination, and define how long boards can wait before tape application. If the board finish varies, test each surface type.
Then control the application method. Avoid stretching the tape. Press the edge deliberately. Use a roller or fixture when the masking line is narrow or critical.
Next, match tape construction to board geometry. If the board has step-downs, narrow contacts, or fine-pitch boundaries, ask whether a more conformable construction or die-cut format would improve edge control.
For populated boards or ESD-sensitive assemblies, review whether low-static polyimide tape is needed. Standard polyimide tape may be acceptable for some bare-board operations, but removal near sensitive components can introduce static risk. ANSI/ESD S20.20 can be referenced as a broader ESD control-program framework, while tape-specific static behavior should come from supplier data under defined test conditions.
This is where many problems begin. A purchasing request may say:
“High-temperature Kapton tape, silicone adhesive, no residue.”
That sounds clear, but for PCB gold finger masking, it is not enough. It does not define the board finish, soldering process, masking width, application pressure, removal timing, static requirement, or acceptable residue level.
A better RFQ says:
“Polyimide tape for PCB gold finger masking during wave soldering. Please recommend film thickness, adhesive thickness, total thickness, peel adhesion range, clean-removal performance after heat exposure, and sample test method. Board finish and process profile are available for review.”
That kind of request tells the supplier you are not buying a commodity roll. You are buying process fit.
Before approving bulk orders, ask for these items:
· polyimide film thickness;
· adhesive thickness;
· total tape thickness;
· adhesive type;
· peel adhesion before and after heat exposure;
· residue behavior after process exposure;
· tensile strength and elongation for narrow-width removal;
· roll width tolerance or die-cut tolerance;
· linered or non-linered format;
· low-static option if used near ESD-sensitive assemblies;
· recommended storage condition and shelf life.
Also share the practical details: board finish, soldering process, temperature profile if available, masking width, contact layout, removal timing, and whether the tape will be hand-applied, fixture-applied, or die-cut.
If possible, send a drawing, photo, or sample reference. A good supplier can usually make a better recommendation from a real masking area than from the phrase “high-temperature tape” alone.
If solder leakage appears near gold fingers:
Inspect the tape edge before soldering under magnification, such as 10x if available. Look for bubbles, wrinkles, edge bridging, poor overlap, or contamination.
If tape curls after reflow:
Check application tension, preheat dwell, peak exposure, tape thickness, and whether the adhesive had full wet-out before heating.
If residue appears after removal:
Compare hot, warm, and room-temperature removal. Also check peel angle, dwell time, heat exposure, and whether the tape was over-aged in storage.
If failures vary by operator:
Standardize cleaning, pressing method, roller use, removal timing, and inspection points. Operator variation is a real process variable.
If the tape passes room-temperature testing but fails in production:
Room-temperature peel does not simulate flux, heat, board finish, or wave impact. Ask for heat-aged tests and run actual board trials.
Can standard Kapton tape be used for PCB gold finger masking?
Yes, in some wave soldering or solder dip applications. But it should be tested for edge sealing, clean removal, residue, and process stability on the actual board. Not every amber polyimide tape is suitable.
Is thicker Kapton tape better for preventing solder leakage?
Not always. Thicker backing can improve handling strength, but it may reduce conformability around steps or narrow contact edges. For gold finger masking, edge seal is more important than thickness alone.
Should I choose low-static polyimide tape for PCB masking?
Consider it when the tape is removed near populated boards or ESD-sensitive components. For bare-board masking, it may not always be required, but static behavior should be reviewed in the process plan.
Why does tape pass bench testing but fail during wave soldering?
Bench testing often misses flux activity, preheat, molten solder movement, and production handling. A tape can look fine at room temperature but lose edge seal under the actual soldering process.
Do I need roll tape or die-cut Kapton tape for gold finger masking?
Roll tape can work for simple straight masking areas. Die-cut Kapton tape is better when alignment, repeatability, small shapes, or fine-pitch boundaries are difficult to control by hand.
What should I ask a Kapton tape supplier before ordering?
Share the soldering process, board finish, masking width, temperature profile, removal requirement, and whether you need custom slitting or die-cut parts. Ask for heat-aged peel and residue data.