
info@jxgreentape.com
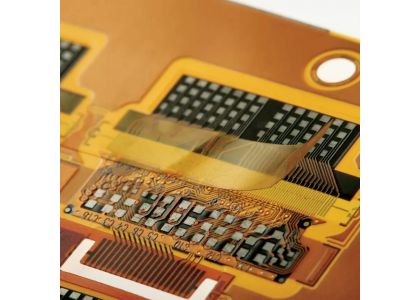
On a PCB assembly line, the masking problem often shows up in a very ordinary place: a row of test pads, a gold finger edge, a connector keep-out area, or a small zone that must be protected from solder, coating, or handling damage. The first few boards may look fine. Then the batch grows, shifts change, and the masking line starts to drift. One mask is slightly off-center. Another has a small wrinkle near the edge. A third takes longer to remove because the operator has to pick at the tape with gloves.
At that point, the question is no longer simply, “Is Kapton tape suitable for PCB masking?” In many cases, it is. The better question is whether a roll-applied masking step is still controlled enough for repeated production.
That is where die-cut Kapton tape for PCB assembly becomes useful. A pre-cut masking shape does not magically solve every process problem, and it should not replace standard rolls in every job. Its real value is more specific: it helps turn repeated manual masking into a more consistent, easier-to-inspect process.
The main decision rule is simple: use standard Kapton rolls when flexibility matters more than repeatability; consider die-cut Kapton tape when the same PCB masking geometry must be placed accurately, inspected easily, and repeated across batches.
Standard Kapton tape rolls are flexible, easy to stock, and useful for many temporary masking jobs. For prototypes, repairs, small adjustments, and low-risk masking areas, roll tape may still be the most practical choice.
But in repeated PCB assembly masking, manual roll application can create small differences from board to board. These differences may look minor during setup, but they can affect edge coverage, removal behavior, inspection consistency, and line speed.
Typical problems include inconsistent edge placement, film stretching, uneven pressure, trapped air, slow hand trimming, and operator-to-operator variation. In a dense PCBA layout, even a small masking shift may expose a pad, cover the wrong contact, or make post-process inspection harder.
The higher the repeat count, the more visible this variation becomes. But volume is not the only trigger. For high-reliability assemblies, even a low-volume build may justify die-cut masking if manual placement risk is unacceptable.
Die-cut polyimide tape is most useful where the shape, location, and masking boundary repeat across boards. Common PCB applications include gold finger masking, test pad arrays, vias, connector keep-out areas, conformal coating keep-out zones, and repeated solder masking points.
For small circular or square areas, buyers may search for Kapton dots for PCB masking, polyimide discs for test pad masking, or Kapton washers for PCB protection. These are not just keyword variations. They describe real product forms used for precise local coverage.
For circular test pads, vias, or small local masking points, pre-cut Kapton dots and polyimide discs can reduce hand-cutting variation. They are useful when operators need to repeat the same pad protection task across many boards without trimming each piece by hand.
The best fit is usually a stable design with repeated geometry. If the same masking zone appears on every board, and manual placement keeps creating variation, die-cut masking is worth reviewing.
The first value of die-cut masking is not speed. Speed is only the visible part. The deeper value is that the masking shape becomes fixed before it reaches the operator. Length, radius, hole position, tab direction, and liner format are no longer decided at the workbench. They are built into the part.
A well-designed die-cut masking tape for PCB can help improve repeatable placement, cleaner edge definition, lower operator dependency, easier inspection, and more stable batch quality. It also helps reduce training burden when the same masking task is performed across shifts or contract manufacturing sites.
Still, the wording should stay realistic. Die-cut Kapton tape does not automatically guarantee higher yield. It helps reduce one source of process variation. Final performance still depends on tape construction, adhesive behavior, board surface, process temperature, liner release, and how the part is applied and removed.
|
Decision Point |
Kapton Tape Rolls |
Die-Cut Kapton Parts |
|
Best for |
Prototypes, repair, changing layouts |
Stable designs and repeated masking |
|
Placement |
Depends heavily on operator skill |
More repeatable when the part is well designed |
|
Shape control |
Cut by hand |
Pre-defined shape and edge |
|
Line speed |
Can slow repetitive tasks |
Can reduce manual trimming steps |
|
Cost structure |
Lower setup cost |
Tooling or converting cost may apply |
|
Flexibility |
High |
Lower after design approval |
|
High-reliability work |
Usable, but more operator-dependent |
Often easier to standardize and inspect |
This comparison is not about declaring one format better in every situation. It is about matching the format to the production problem.
Many teams think die-cut Kapton tape only makes sense for high-volume production. That is often true, but not always.
In medical electronics, aerospace electronics, automotive power modules, and other high-reliability PCBA work, a low-volume build may still require a more controlled masking process. IPC Class 3 is commonly associated with high-reliability electronics where products are expected to maintain performance continuity and require tighter process control than general consumer-grade assemblies.
So the decision should not be based only on quantity. A 20-board engineering build for a critical system may deserve pre-cut masking if one random bubble or misplaced edge can create unacceptable risk. Product criticality, inspection requirements, and rework cost all matter.
A good RFQ for custom die-cut Kapton tape should include more than “please quote this size.”
Useful inputs include shape, critical dimensions, tolerance requirements, masking margin, pitch and spacing, adhesive side direction, liner type, roll or sheet format, easy-peel tab requirement, and application method. If the part will be used near gold fingers, test pads, or coating keep-out zones, mark the critical edge clearly.
That said, buyers do not always have a ready DXF or DWG file. This should not stop the project. If you do not have a finished die-cut drawing, send a PCB photo, Gerber screenshot, bare-board sample, gold finger area dimensions, or a marked-up image. A capable die-cut Kapton tape supplier can usually help convert the masking area into a sample drawing for review before tooling.
This reduces friction and shortens the first sampling cycle. It also helps both sides avoid quoting the wrong shape, wrong liner format, or wrong adhesive side.
A die-cut part is not only a piece of tape. The liner and delivery format decide whether operators can actually use it efficiently.
Common formats include kiss-cut polyimide tape on rolls, sheeted die-cuts, individual pieces, clear PET liner, split liner, and easy-peel pull tabs. For manual placement, a tab may help operators remove the mask without digging at the tape edge. For fixture or semi-automated placement, orientation and part spacing on the liner become important.
Clear polyester liners can help visibility during manual handling, while roll formats may support repeat feeding depending on equipment and presentation format. Do not assume every die-cut layout is automation-ready. Define how the operator or machine will pick, place, and remove the part.
Buyers often ask, “What tolerance can you hold?” That is a fair question, but the answer depends on more than the cutting tool.
Die-cut tolerance can be affected by part size, geometry, film thickness, adhesive coat weight, liner stability, cutting method, web tension, and matrix stripping. Thin polyimide film can relax slightly after conversion, especially when narrow shapes, long strips, or tight patterns are involved.
For narrow strips, small discs, washers, or dense layouts, tolerance should consider not only the cutting method but also liner stability, web tension, adhesive coat weight, matrix stripping, and possible film relaxation after conversion. The critical tolerance should be defined around the functional masking edge, not every non-critical outline.
So avoid treating tolerance as a generic number copied from a brochure. For critical masking boundaries, define which dimensions are truly critical, how they will be measured, and whether the tolerance applies to the die-cut part on the liner or after removal and application.
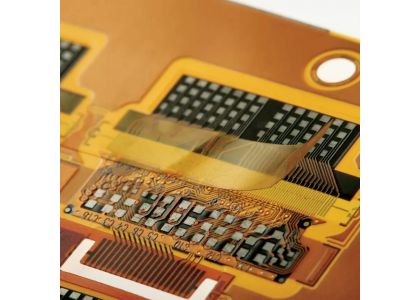
Die-cut format improves placement, but it does not eliminate adhesive risk. Surface finish still matters.
ENIG, HASL, OSP, solder mask, FR-4, and conformal coating surfaces can show different peel and residue behavior. For OSP or other solderability-sensitive finishes, it is safer to verify heat-aged residue and solderability on the actual board instead of assuming that one clean-removal result applies everywhere.
For incoming comparison, peel adhesion can be tested using recognized pressure-sensitive tape methods such as ASTM D3330, but board-level validation is still necessary because stainless steel peel data does not fully represent every PCB finish.
If the masking part will pass through soldering, reflow, or coating processes, ask for sample testing close to the real process condition.
Before mass production, test the die-cut sample on the real PCB.
Check fit first. Does the shape cover the target area without blocking the wrong pad or contact? Then check liner release. Can the operator remove the part smoothly with gloves? Does the pull tab help or get in the way?
Next, run the sample through the intended process. Inspect edge coverage, edge lift, residue, removal behavior, and operator handling time. If the part is used for conformal coating keep-out, check coating boundary control. If used for gold finger masking, inspect the contact edge after removal.
A small sample review can prevent a large tooling or batch mistake. Do not approve die-cut masking only from a CAD image.
The most common mistake is giving only the outer size and ignoring tolerance. Another is sending a rough sketch without marking the critical edge.
Other issues include forgetting liner format, not defining adhesive side, ignoring pull-tab direction, choosing a die-cut part while the PCB layout is still changing, and skipping process validation before bulk order.
One more practical problem: buyers sometimes request a very tight tolerance everywhere, even when only one edge is critical. That increases cost and slows sampling. Mark the critical area clearly. Let the supplier know which dimension affects function and which dimension is only for handling.
Die-cut Kapton tape is worth considering when the geometry repeats, placement accuracy matters, inspection consistency is important, or the product is high value enough that random manual variation is unacceptable. It is also a good fit for stable PCBA designs, high-reliability work, and repeated masking around gold fingers, test pads, vias, connectors, or coating keep-out zones.
Standard rolls are still better for prototyping, low-risk repairs, frequent layout changes, and simple masking areas where placement is not critical. Rolls are flexible and economical. They should not be dismissed.
The real decision is not “rolls or die-cuts.” The real decision is whether the masking task is still a flexible manual operation, or whether it has become a repeatable process that deserves a repeatable masking part.
Can I start a die-cut Kapton project without a DXF or DWG drawing?
Yes. A drawing helps, but it is not always required at the first step. A PCB photo, Gerber screenshot, bare-board sample, or marked masking area can be enough for an initial review. The supplier can help convert the masking zone into a sample drawing before tooling.
Should I use die-cut Kapton tape for low-volume PCB assembly?
Not always. Standard rolls are better for prototypes, repairs, and layouts that change often. Die-cut parts make sense in low-volume work when the board is high value, the masking area is critical, or manual placement variation is unacceptable.
Why does liner format matter for die-cut Kapton tape?
The liner controls how the operator picks and places the part. A poor liner format can slow placement, cause edge damage, or make small discs hard to remove. Clear PET liner, split liner, pull tabs, sheet format, or kiss-cut rolls should be chosen based on handling method.
What tolerance should I request for custom polyimide die-cut parts?
Do not request the tightest tolerance everywhere by default. Define the functional edge first. Tolerance depends on part size, geometry, film thickness, adhesive coat, liner stability, cutting method, and matrix stripping. Critical and non-critical dimensions should be separated.
When are standard Kapton rolls still the better choice?
Rolls are better when the masking area is simple, the design changes often, placement is not critical, or the application is low risk. Die-cut parts are most useful when the same shape must be repeated with stable placement and easier inspection.
Need custom polyimide masking shapes for PCB assembly? Send a PCB photo, Gerber screenshot, sample board, or drawing with the critical masking area marked. We can help review the shape, liner format, adhesive side, and sample approach before moving to production.
· 3M Polyimide Film Tape 5413 Technical Data Sheet — reference for polyimide tape use in PCB gold finger protection during wave solder or solder dip processes.
· ASTM D3330 / D3330M — peel adhesion test method for pressure-sensitive tapes.
· ASTM D3652 / D3652M — thickness measurement method for pressure-sensitive tapes.
· ASTM D3759 / D3759M — tensile strength and elongation test method for pressure-sensitive tapes.
· IPC Class 3 reference context — commonly associated with high-reliability electronic assemblies where product performance continuity and tighter process control are expected.